

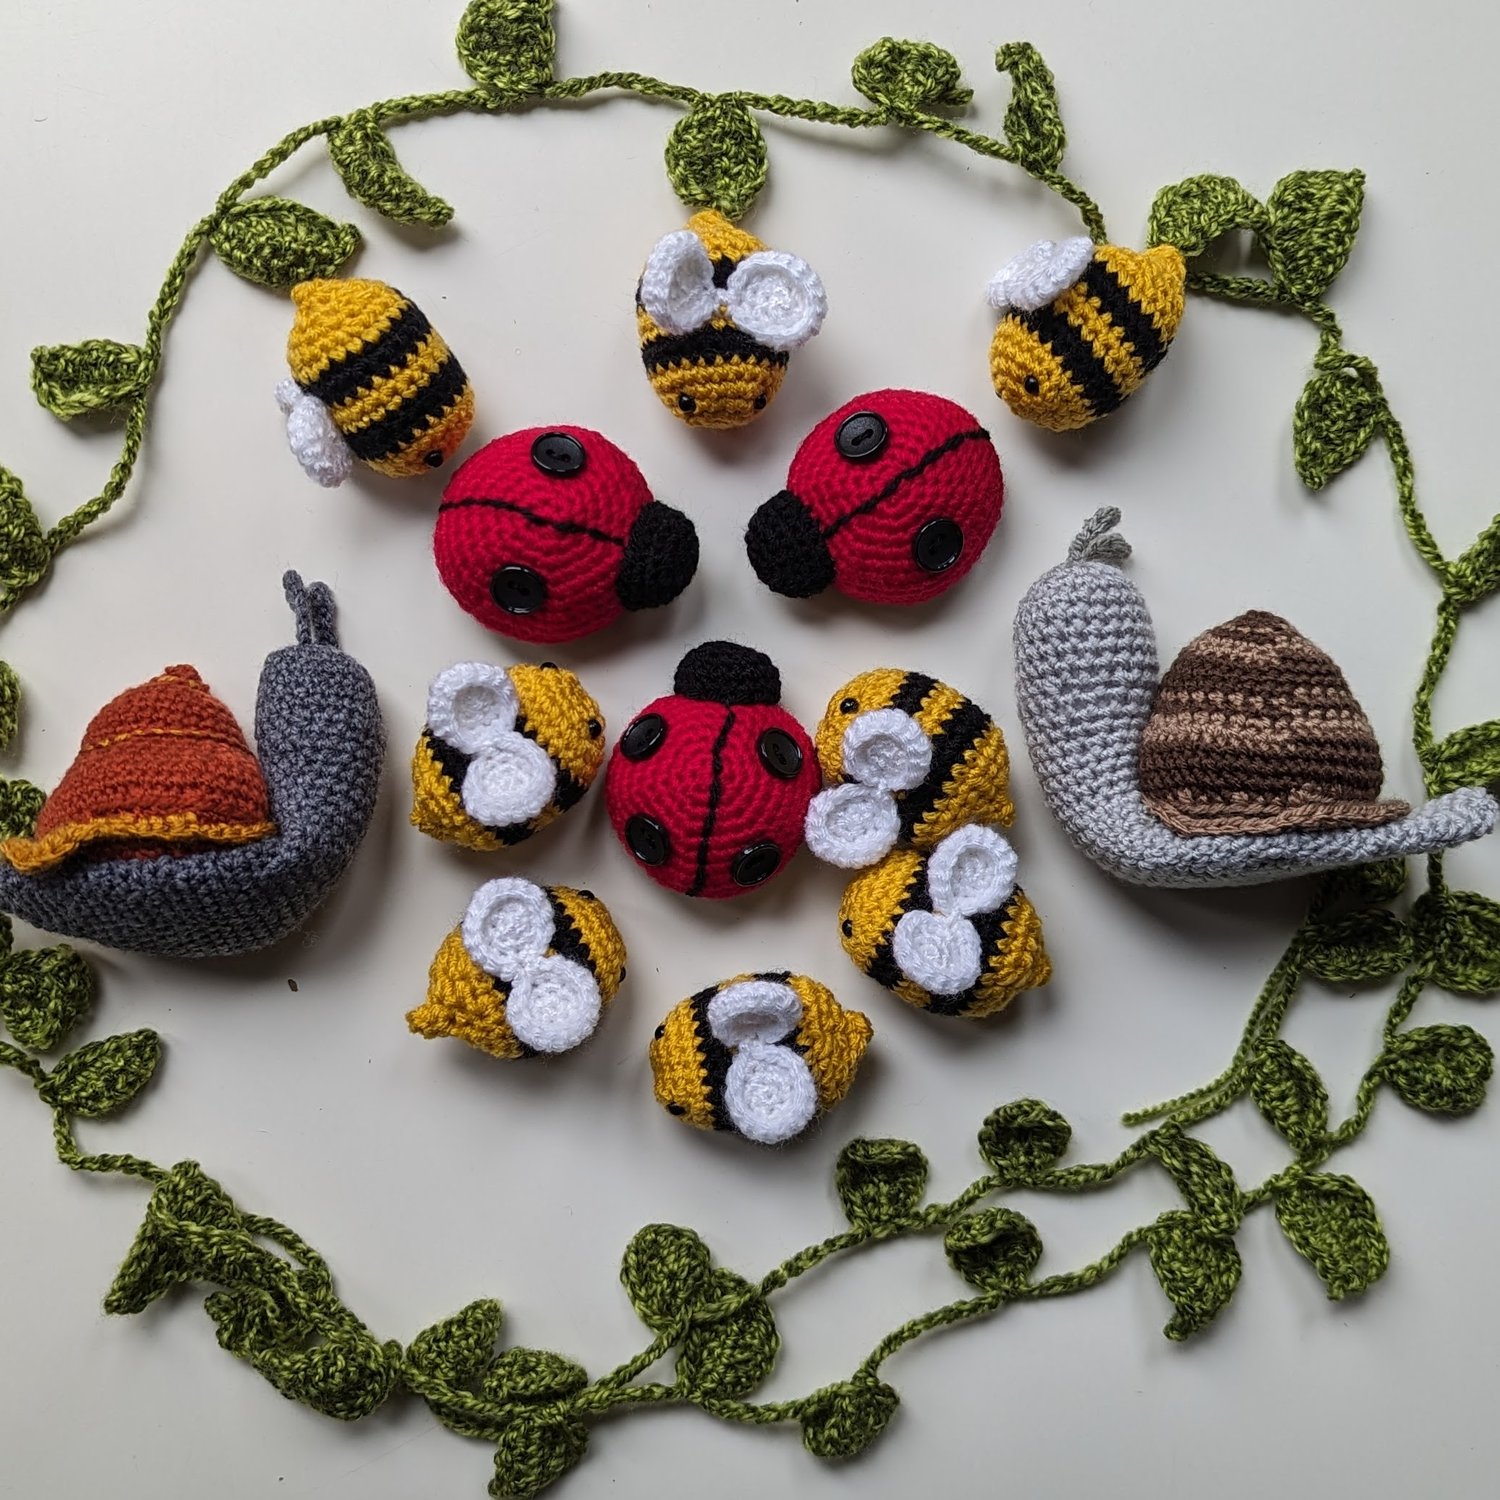
I recently made some ladybugs and bumble bees for Fudges Shop window here in Cullompton to celebrate the Yarn Crawl by UK Handknitting. Here are my patterns for both:

Bumble Bee
Difficulty
Using US terminology throughout the bee is made from end to end using single crochet in continuous rounds before being stuffed.
Yarn and Notions
Small amounts of yellow, black and white in double knit (8ply)
3mm crochet hook
Two 5mm black plastic toy eyes (optional) – or you can sew on eyes with embroidery thread or black yarn
Small amount of stuffing
Stitch marker (optional)
Needle for sewing up
Measurement
6cm from end to end, 3cm wide
Abbreviations
ch – chain
dec – crochet next two stitches together to decrease
inc – place two single crochet in the same stitch to increase
sc – single crochet
st(s) – stitch(es)
*_____* - repeat instructions between
Body
1. In yellow, either create a magic ring and work in this or ch2 and work in the first ch – 6sc
Then continue working in continuous circles using a stitch marker to help see where your round ends
2. inc in all sts – 12 sts
3. *sc, inc* - 18 sts
4. *sc2, inc* - 24 sts
5. sc all sts, change to black at the end of the round
6. sc all sts
7. sc all sts, change to yellow at the end of the round
If using add your toy eyes at this stage, place them at round 3
8. sc all sts
9. sc all sts, change to black at the end of the round
10. sc all sts
11. sc all sts, change to yellow at the end of the round
12. *dec, 2sc* - 18 sts
13. *dec sc* - 12 sts
Stuff your bee
14. dec – 6 sts
Leave a long end, use this to sew up the closure
Wings – make 2
1. In white, either create a magic ring and work in this or ch2 and work in the first ch – 5sc
Then continue working in continuous circles, use a stitch maker if you need help to see where your round ends
2. inc – 10 sts
3. *sc, inc* 15 sts
4. sc
End yarn leaving sufficient to sew both wings to the top of your bee, you can sew these where your yarn changes have happened to hide this.
Bee-utifully done!
Ladybug
Difficulty
Using US terminology throughout you will work the body and the head in continuous single crochet rounds before adding the head and finishing
Yarns and Notions
Small amounts of red and black yarn in double knit (8ply)
3mm hook
Small amount of stuffing
Either black buttons or black felt to create ladybug spots
Needle for sewing up
Stitch marker (optional)
Measurement
7cm in diameter
Abbreviations
ch – chain
dec – crochet next two stitches together to decrease
inc – place two single crochet in the same stitch to increase
sc – single crochet
st(s) – stitch(es)
*_____* - repeat instructions between
Body
1. In red, using either a magic loop and working in this or ch2 and working in the first ch – sc 6
2. inc – 12 sts
3. *sc, inc* - 18 sts
4. *sc2, inc* - 24 sts
5. *sc3, inc* - 30 sts
6. *sc4, inc* - 36 sts
7. *sc5, inc* - 42 sts
8. sc all sts
9. sc all sts
10. sc all sts, change to black at the end of the round
11. Working in the back loop, sc all sts
12. *sc5, dec* - 36 sts
13. *sc4, dec* - 30 sts
14. *sc3, dec* - 24 sts
15. *sc2, dec* - 18 sts
16. *sc, dec* - 12 sts
Stuff your ladybug
17. dec – 6 sts
End your yarn and sew up the closure
Head
1. Using black, using either a magic loop and working in this or ch2 and working in the first ch – sc 6
2. inc – 12 sts
3. *sc, inc* - 18 sts
4. sc all sts
5. sc all sts
End your yarn, leaving a long length for sewing the head to the body. Lightly stuff the head and place it over where your red and black yarn joined to hide this. Sew in place.
Finishing
Using a length of black yarn back stitch a line from the centre of the head, over the back of the ladybug to the back. Then add either your buttons or felt circles for the spots.
Enjoy! Please share any creations and if you use this pattern please refer back to it so others can find it too.